
Creating a Keycloak OpenID Client
To configure Keycloak SSO for Proxmox VE, you need to create a Keycloak OpenID client with the following settings:
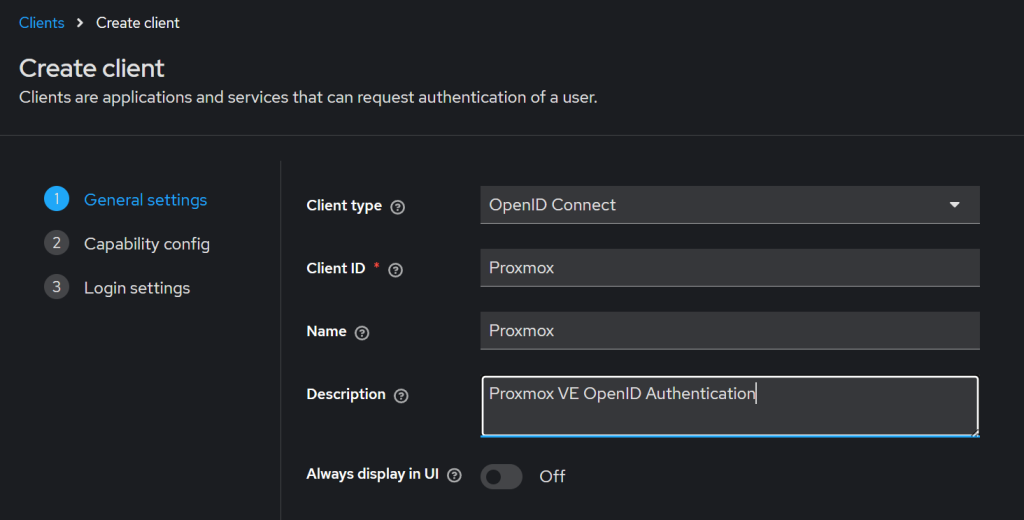
General Settings:
Client type: OpenID Connect
Client ID: Proxmox
Name: Proxmox
Description: Proxmox VE OpenID Authentication
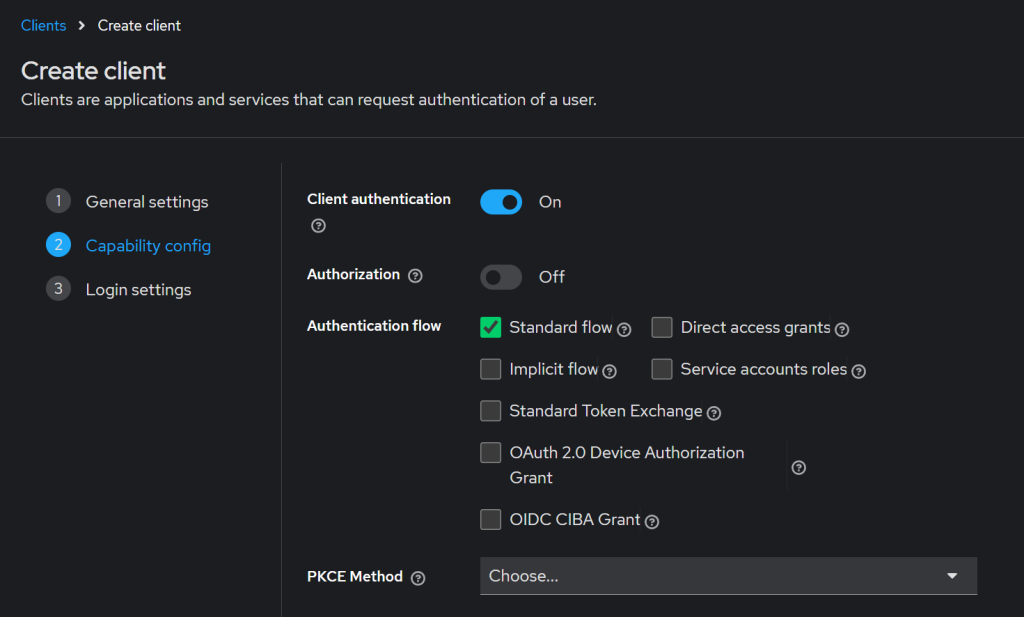
Capability config:
Client authentication: On
Authentication flow: Standard flow
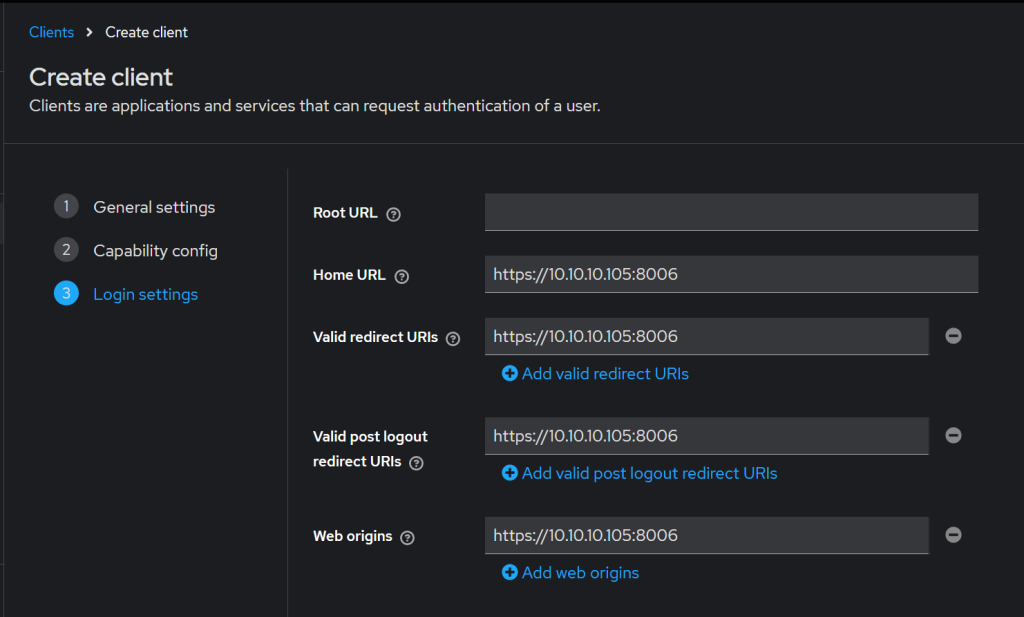
Login settings:
Home URL: https://10.10.10.105:8006
Valid redirect URIs: https://10.10.10.105:8006
Valid post logout redirect URIs: https://10.10.10.105:8006
Web origins: https://10.10.10.105:8006
Configuring Keycloak OpenID Authentication in Proxmox VE
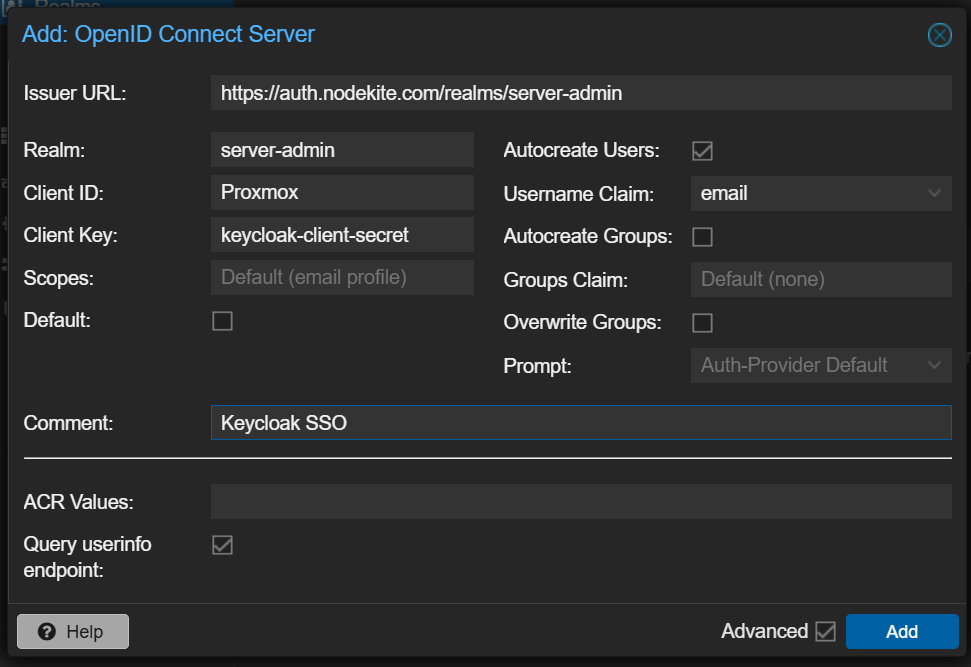
In Proxmox VE, navigate to Datacenter > Permissions > Realms > Add > OpenID Connect Server and create a realm with the following settings:
Issuer URL: https://auth.nodekite.com/realms/server-admin
Realm: server-admin
Client ID: Proxmox
Client Key: <keycloak-client-secret>
Autocreate Uers: checked
Username Claim: email
Comment: Keycloak SSO
Logout from your Proxmox root account and select Keycloak SSO from the Realm dropdown menu of the Proxmox VE Login window. Once you log in to your Keycloak account, you will also be logged in to your Proxmox dashboard and be redirected to your Proxmox dashboard.
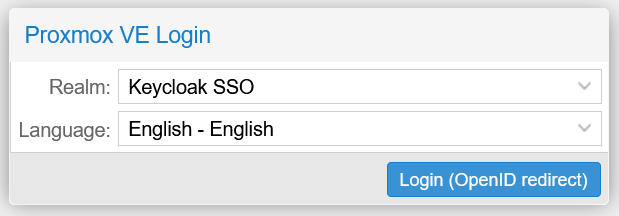
You will not have admin privileges. So you can’t do much in Proxmox yet.
To configure admin privileges for the Keycloak SSO user, logout and login as the Proxmox VE root user using the Realm Linux PAM Standard authentication.
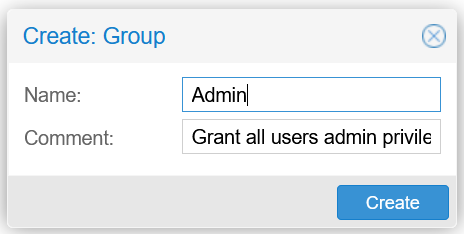
Navigate to Datacenter > Permissions > Groups and click on Create and create a group with the following settings:
Name: Admin
Comment: Grant all users admin privileges
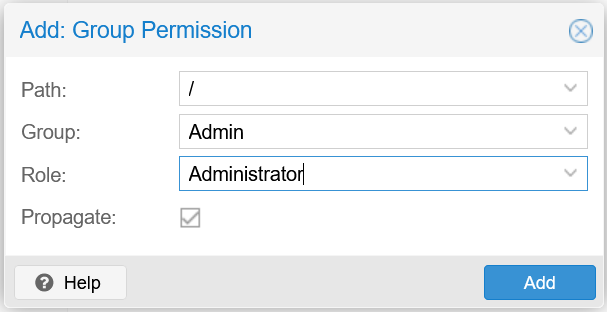
Navigate to Datacenter > Permissions and click on Add > Group Permission to create a group permission with the following settings:
Path: /
Group: Admin
Role: Administrator
Propagate: checked
Finally, navigate to Datacenter > Permissions > Users, select the newly created Keycloak SSO user, and click on Edit. Change the Group to Admin and save the changes.
Now, you should be able to log in to Proxmox using Keycloak SSO and administer the Proxmox VE server.